
Bookings
Manage, import, export, activate or cancel your bookings at the click of a button.
Import bookings
1. Navigate to Apps > CoAttend > Bookings and click the Import button.
2. Download the sample csv file.
3.
Edit csv file and fill the rows and columns.
Add your custom fields as new columns after the Order name column.
 Import bookings.
4.
Select your event and language. Upload your csv file.
 Upload CSV.
5. Preview and verify the data.
6. Click the Import button.
Export bookings
1.
Navigate to Apps > CoAttend > Bookings and click the Export button.
 Export bookings.
Note: Your export CSV file is based on current list's filters and selections.
Add new booking(s)
You can add new bookings by creating a new order manually.
1. Navigate to Customers and select your customer.
2.
Click More Actions > Add booking(s).
 Add booking(s) example.
3.
Make sure the Customer is filled and select the Status of the new order.
 Order status example.
4.
Search and select the Events that you wish to add to the order. Click the Edit button to add the attendees (per event).
 Events example.
5.
Fill the Full name, Email, Language and the Custom fields of the event ( if any). Click the Add an Attendee button to add multiple attendees to the event. Click Save.
 Add an attendee example.
6.
When you are done, click the Save button and the new order will be created.
 Save the order.
Note: If the order status was Paid, the new bookings will be visible to the list. In case of Pending, the bookings will appear when you receive the payment.
Cancel a booking
If you cancel an order from your Shopify admin (Orders section), all the bookings will be cancelled automatically and cancellation emails will be sent (this option needs to be enabled on CoAttend's Email settings page).
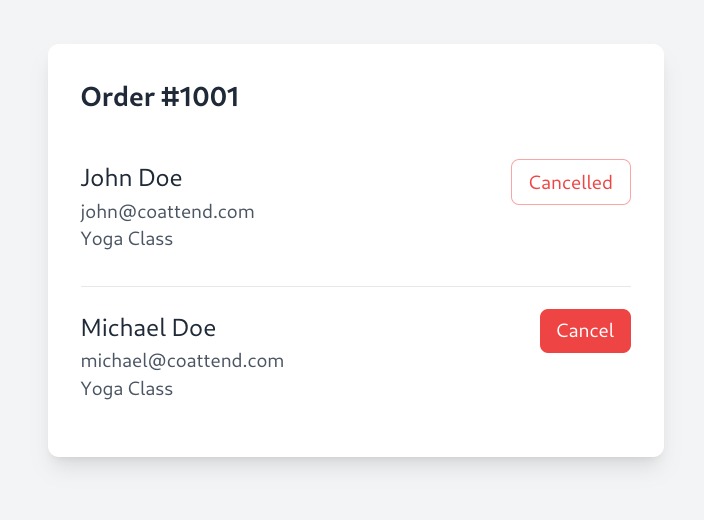
To cancel a single booking navigate to Apps > CoAttend > Bookings, find the booking and click Cancel this booking.
Note: In this case, the inventory will NOT be updated automatically. If you need to change the availability for this event, you can navigate to Products, find the product and update the inventory.
 Cancel a single booking.
Activate a canceled booking
Navigate to Apps > CoAttend > Bookings, find the canceled booking and click Activate this booking.
Note: In this case, the inventory will NOT be updated automatically. If you need to change the availability for this event, you can navigate to Products, find the product and update the inventory.
 Activate a single booking.
Switch booking to different event
1. Navigate to Apps > CoAttend > Bookings, find the booking and click Switch under the Event section.
2. Search and select the event you wish to switch to.
3. Click the Save button
Note: Available seats for this event, will not update automatically. If you wish to update event's available seats, you can change the inventory from the product page.
 Switch to a different event.
Delete a booking
1. Navigate to Apps > CoAttend > Bookings and select your booking.
2.
Click the Delete Booking button and confirm.
 Delete booking.
Allow customers to cancel their bookings
Enable customers to cancel their bookings easily, providing them with a seamless and hassle-free experience while managing their reservations.
- Go to Apps > CoAttend > Email Templates and choose the Booking Confirmation template or any template where the recipient is an Attendee.
- Insert the Cancellation URL placeholder next to a message like "Need to cancel this booking? Click here."
 Cancellation URL placeholder.
3. Save the template.
Cancellation URL placeholder.
3. Save the template.
Customers can cancel/restock their booking by accessing this URL.
 Cancellation page.